For inking in Photoshop I first recommend doing your sketch on plain, ordinary printout paper. No sense in wasting your precious heavy-weight art pads when it doesn't make any dang difference.
 Having a clean sketch is important! It makes it much easier to follow the right lines. :) I'm an extremely messy sketcher.. So to get my sketch cleaned up I used a cheap old Lion King light table to trace a cleaner pic. ;) Which is another reason to use light-grade paper! Easier to trace.
All right! You've scanned your pic in, hopefully at something like 300-400 dpi. First thing is to go Layer > New > Layer; Layers is something you should get familiar with because, in my opinion, it's one of the key elements of Photoshop. ;)
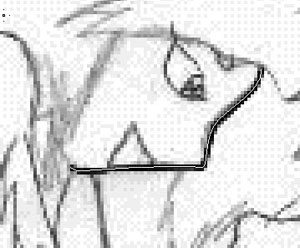
 Now, look at your Toolbar. See the little Pen Tool? Click and hold down on it, then select the Freehand Pen Tool — it's the one highlighted in the guide pic. Zoom in to the % that's good for you to follow lines at, then draw over one of the sketch lines in the pic with your Pen Tool. Here we'll do Redkyte's face first.
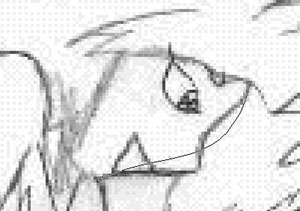 Oopsie! The line went all to heck, didn't it? Never fear! A lot of computers like to do that with the Pen Tool... especially mine.
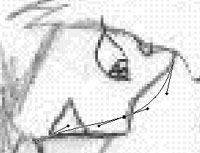 First of all we better get the point for the nose in. Click on a point in the line where you think it needs to be pulled in/pushed out. See that little square dot with the two other lines coming out? Hold the CTRL key down and click on it, then drag it where it should go. Repeat as necessary. And, remember those little lines coming out from the square points? You can pull and push those around to get the desired curves you want, pull them in all the way to get angular things. Mastering this part of inking just takes a lot of practice. :)
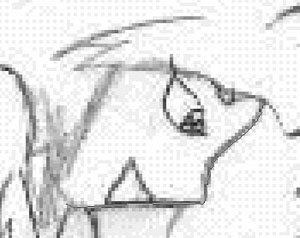 Alrighty! We have one line the way we want it! Now, click on the Paintbrush Tool and select the brush that's the right size for your line.
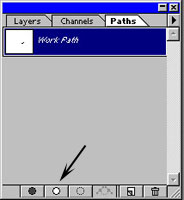 Now go up to Window > Show Paths. Paths is a MARVELOUS feature! If Cali lets me do a tutorial on realistic lightening, you'll see Paths is very wonderful. ;) (*note* If you have more then one line with your Pen Tool then hold the CTRL key down—with the Freehand Pen—and draw a box around your lines to select them all) Still got your Paintbrush selected? Click on "Stroke Path", the little white circle with the arrow pointing to it. That'll fill your "Work Path" line(s) like you'd gone over them with just the Paintbrush! Make sure your current layer is the transparent one we created earlier.
 You should now have something that looks like this! To get rid of that line in the middle click on the
  on the Paths window and select "Turn Off Path."
Once you're all done creating your lines on that transparent layer, right-click on the layer with the actual sketch on it and do "Delete Layer." Then Layer > Flatten Image. There you go! A pic that's all ready for coloring! Now, being the doodoo head that I am, I accidentally saved over the file that was the fully-inked pic. ;P But I do have the colored one if you wanna see the result. ;)
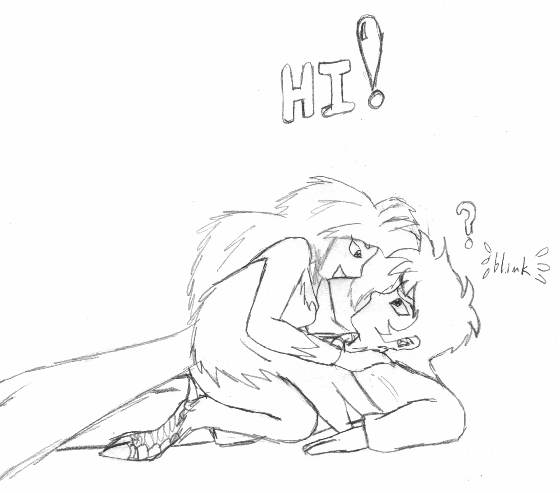
"What's with that bird and Ryo?" you may be asking.. All I'll say is some friends and I have some extremely chaotic roleplays that involve that bird, Ronin Warriors, some gargoyles, some Jedi, Darth Maul, Mighty Ducks, some D&D, an undead werewolf, Lupichana, our own psychotic selves, and various other fanmade and surplus characters. ;) We have to explore the Realms of Confusion and Insanity SOMEHOW!! ;D ...A page by that name coming soon to web-surfers like you!