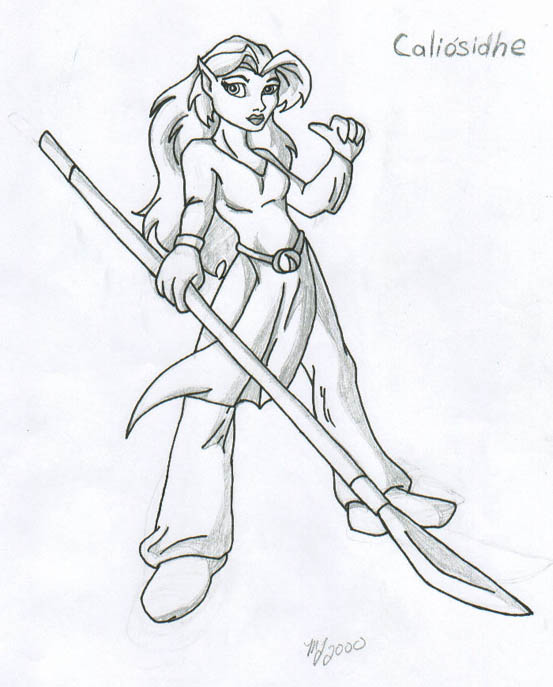
Coloring tutorialfor Beginning Photoshop UsersStep Two: The Coloring ProcessColoring seemsharder at first, but the more you practice, the easier it gets.This is how to do simple Cel-style coloring, which alot of peopleseem to prefer over plain Gradient Fills, without using layers.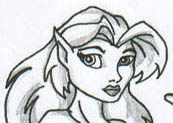 Nope, we haven't gone back to theinked drawing....quite. When doing block coloring, I like to goback to my inked drawing, and shade the areas by hand, that I'mgoing to be darkening with my computer. Consider this a patternon how you are going to color it in later. Click on the imagefor full sized view and detail :)
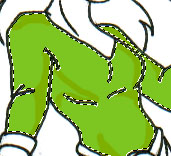 Now,on to the actual coloring, I'll start with her shirt. Select theentire area with the magic wand tool
 <-----If you want to do more then one area at once, hold down shiftwhile selecting them. Then flood fill it with the color of yourchoice. After that, you can begin drawing in your darker areas.Leave the magic wand on through this process!! It willkeep you from coloring over your black lines. Draw in the guidesfor your darker parts with the Paintbrush. and fill them in..stillwith the paintbrush. Don't worry too much if you get too off course.Just go back to your original color and edit and mistakes out.See? This is simpler then you thought!
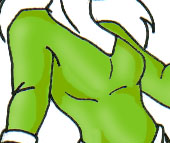 Nextstep is to add hightlight, you REALLY need to add this to adda little depth, even in a simple coloring style like this. So,you select the paintbrush, choose white as the color. And checkyour options on your upper right hand tool window. Don't havethe pressure set any higher then ten for highlighting. On darkercolors, you may want to lower it to three or so. The highlightingis done freehand, WITH the magic wand still having the whole areaselected. It detracts from the blocky look, but gives the wholepicture a safter, more natural (if that can apply) look. Repeatthis with the whole drawing
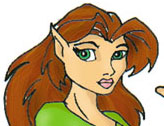 Now,your alost done, but not quite! Notice all of the little whitespots where that the magic wand didn't grab right off. All that'sleft is really to do clean-up. You can click the image to seethe full view. Select the smudge tool (the lil pointy finger oneon the left hand side) And set it's pressure at 100% Now, rightclick your image with it, and select darken. This mean it willonly smudge things lighter then the color you are using, suchas those annoying little white spots ;) Be careful not to go outof the lines wile smudging. Like everything else, this takes alittle practice. After you've finished with that...NOW your pictureis ready ;) Click Here to see the Finished Product. After it's been resized and saved as a .jpg ;)
All done! Back to The Tutorials!
 Nope, we haven't gone back to theinked drawing....quite. When doing block coloring, I like to goback to my inked drawing, and shade the areas by hand, that I'mgoing to be darkening with my computer. Consider this a patternon how you are going to color it in later. Click on the imagefor full sized view and detail :)
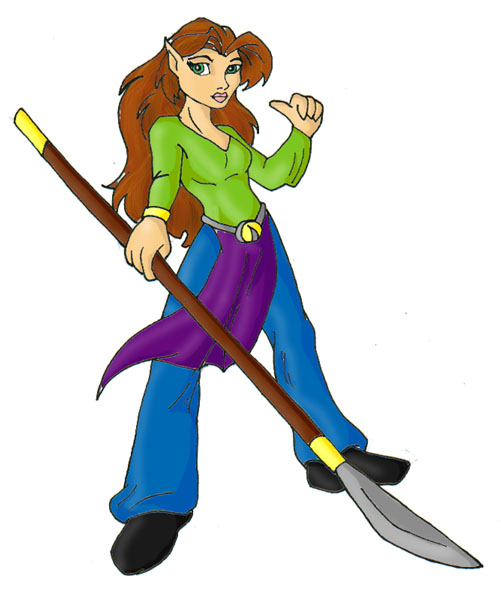